Unlock the full potential of Linux directly on your Windows 11 system with the Windows Subsystem for Linux (WSL). If you're an indie maker, developer, startup founder, or any tech-savvy individual aiming to streamline your workflow, this guide delivers the most straightforward method to install WSL on Windows 11. We'll cover the quick one-command setup, delve into what WSL is, explore its powerful benefits (especially for building scalable online projects), and show you how to manage your Linux environments for maximum productivity and creative freedom.
Table of Contents
- TL;DR: The Quickest Way to Install WSL on Windows 11 (One Command)
- What is WSL (Windows Subsystem for Linux)? A Quick Primer
- Why Install WSL? Top Benefits for Makers & Developers
- Step-by-Step: How to Install WSL 2 on Windows 11 (Comprehensive Guide)
- Customizing Your WSL Setup
- Understanding WSL1 vs. WSL2: Key Differences
- Essential WSL Commands for Everyday Use
- Key WSL Features and How to Use Them
- Common WSL Installation Hiccups & Quick Fixes
- Uninstalling WSL and Linux Distributions
- WSL Frequently Asked Questions (FAQ)
- Conclusion: The Best of Both Worlds on Your Windows Machine
TL;DR: The Quickest Way to Install WSL on Windows 11 (One Command)
For most users with an up-to-date Windows 11 system, installing WSL and the default Ubuntu distribution is incredibly simple with a single command:
- Open PowerShell or Command Prompt as Administrator:
- Search for "PowerShell" or "CMD" in the Windows Start Menu.
- Right-click on the result and select "Run as administrator."
- Run the Installation Command:
In the administrator terminal, type the following command and press Enter:
wsl --install - Reboot Your Computer: When prompted, restart your computer to complete the installation.
- Set Up Your Linux User: After rebooting, your installed Linux distribution (Ubuntu by default) will open a terminal window. Follow the prompts to create a new UNIX username and password.
That's it! You now have a fully functional Linux environment, typically WSL 2, on your Windows 11 system.
If you are looking for official documentation, you can read more here from Microsoft WSL Page and here from the Ubuntu WSL Page.
For more details, alternative distributions, understanding what WSL actually is, and its powerful uses, read on!
What is WSL (Windows Subsystem for Linux)? A Quick Primer
Windows Subsystem for Linux (WSL) is a powerful feature in Windows 10 and Windows 11 that enables you to run a genuine GNU/Linux environment directly on your Windows machine, without the overhead of a traditional virtual machine (VM) or the complexity of a dual-boot setup. WSL integrates Linux deeply into Windows, allowing you to use Linux command-line tools, utilities, and applications alongside your standard Windows applications.
There are two main versions:
- WSL 1: The initial version provided a translation layer for Linux system calls to work with the Windows NT kernel. It offered good access to Windows files but had limitations with full system call compatibility (e.g., Docker performance was often suboptimal).
- WSL 2: The current and highly recommended version. WSL 2 utilizes lightweight virtual machine technology to run a full, genuine Linux kernel. This architecture offers significantly better performance for Linux file operations, complete system call compatibility (making tools like Docker and systemd run flawlessly), and a more robust overall Linux experience.
The wsl --install command automatically installs and sets up WSL 2 by default on supported systems, ensuring you get the best performance and features out of the box.
Why Install WSL? Top Benefits for Makers & Developers
For indie makers, developers, and anyone building scalable online projects, choosing to install WSL on Windows offers numerous advantages:
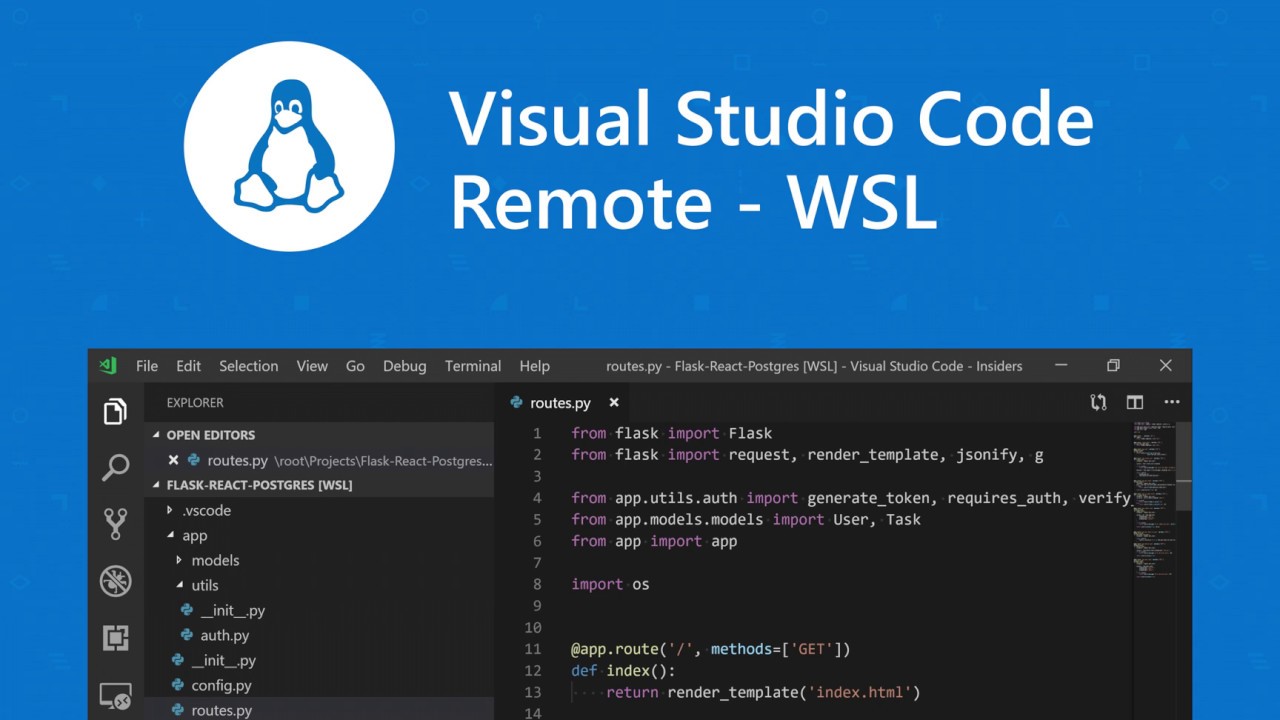
- Seamless Development Workflows: Utilize your favorite Linux development tools (Bash, Git, awk, sed, Grep, etc.) and programming languages (Python, Ruby, Node.js, Go) directly on Windows. Integrate effortlessly with Windows applications like Visual Studio Code using its Remote - WSL extension.
- Access to a Vast Ecosystem of Linux Tools: Easily install and run thousands of Linux applications and utilities using package managers like
apt(for Debian/Ubuntu) oryum(for Fedora). - Enhanced Productivity: Eliminate the need to dual-boot or manage cumbersome virtual machines. Switch between Windows and Linux environments instantaneously.
- Running Docker Natively (via WSL 2): Docker Desktop for Windows leverages the WSL 2 backend for a significantly faster and more robust experience running Linux containers. This is crucial for developing, building, and testing containerized applications, a cornerstone for scalable income and freedom-first project design.
- AI/ML Development: WSL 2 supports GPU acceleration (NVIDIA CUDA and DirectML), enabling you to run machine learning and artificial intelligence workloads directly within your Linux environment on Windows.
- Learn Linux: Provides a safe, isolated, and convenient way to learn Linux commands and explore different distributions without the commitment or risks of a dual-boot system.
- Full System Call Compatibility (WSL 2): Run virtually any Linux application without modification, thanks to the genuine Linux kernel in WSL 2.
- Resource Efficiency: WSL 2 runs as a lightweight utility VM, often consuming fewer resources than a full traditional virtual machine, making it an efficient choice for running Linux alongside Windows.
Step-by-Step: How to Install WSL 2 on Windows 11 (Comprehensive Guide)
While the one-command method is fastest, let's explore the prerequisites and steps in more detail to ensure you can successfully install WSL 2 on Windows 11. While this guide focuses on Windows 11, the wsl --install command and most subsequent steps are also applicable for Windows 10 (version 2004 and higher).
Prerequisites
Before you begin, ensure your system meets these requirements:
- Operating System: Windows 10 version 2004 and higher (Build 19041 and higher) or any version of Windows 11.
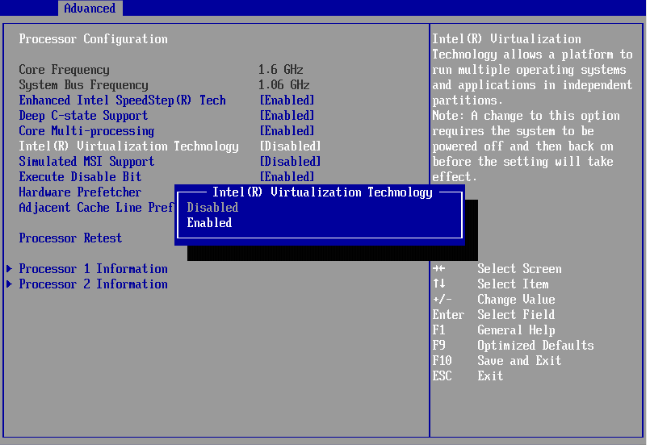
- Virtualization Enabled: WSL 2, the default and recommended version, requires virtualization technology to be enabled in your system's BIOS/UEFI.
- How to Check: Open Task Manager (Ctrl+Shift+Esc), go to the "Performance" tab, select "CPU." Look for "Virtualization: Enabled."
- How to Enable (if disabled): Restart your computer and enter the BIOS/UEFI settings (common keys: DEL, F2, F10, F12, or ESC during startup). Look for settings related to "Virtualization Technology," "Intel VT-x," "AMD-V," or "SVM Mode," and ensure they are enabled. The exact naming and location vary by PC manufacturer.
The wsl --install Command In-Depth
As highlighted in the TL;DR, the simplest way to install WSL Windows 11 (which defaults to WSL 2) is using the wsl --install command. This command is the modern, streamlined way to install WSL, and it performs several actions automatically, typically setting up WSL 2 by default for the best experience.
-
Open PowerShell or Command Prompt as Administrator:
- Search for "PowerShell" or "CMD" in the Windows Start Menu.
- Right-click on the application and select "Run as administrator."
-
Run the Install Command: In the administrator terminal window, type:
bash
                        wsl --install
This single command will typically:- Enable the necessary Windows features for WSL (like "Virtual Machine Platform" and "Windows Subsystem for Linux").
- Download and install the latest Linux kernel for WSL 2.
- Set WSL 2 as the default version for any new installations.
- Download and install the Ubuntu distribution of Linux by default (this can be changed, see "Customizing Your WSL Setup" below).
-
Reboot Your Computer: Once the process completes, you'll likely be prompted to restart your computer. Save any open work and reboot to finalize the WSL installation.
Setting Up Your First Linux Distribution
After your computer restarts:
- The Ubuntu distribution (or whichever was installed as default) should automatically open a console window. If it doesn't, find "Ubuntu" (or your distro's name) in the Start Menu and launch it.
- You'll be asked to wait for a few moments while files are decompressed and stored on your machine.
- Then, you'll be prompted to:
- Create a new UNIX username. This is specific to your Linux environment and can be different from your Windows username.
- Create a password for this user and confirm it.
Remember this username and password, as you'll need them for
sudo(superuser) commands within your Linux environment.
Verifying Your WSL Installation
To confirm that WSL and your Linux distribution are installed and configured correctly (ideally using WSL 2), open a new PowerShell or Command Prompt window (it doesn't need to be as administrator for this command) and run:
wsl -l -v
or the more verbose:
wsl --list --verbose
This command will list your installed Linux distributions, their current state (e.g., Running or Stopped), and importantly, the WSL version they are using (1 or 2). You should see your distribution listed with VERSION 2.
Customizing Your WSL Setup
The default wsl --install command installs Ubuntu. However, WSL supports a variety of Linux distributions. Here's how to manage and install others.
Listing Available Linux Distributions
To see a list of Linux distributions available for WSL download and installation directly through the wsl command, open PowerShell or Command Prompt and run:
wsl --list --online
Or the shorter alias:
wsl -l -o
This will display a list of distributions such as various Ubuntu versions (e.g., Ubuntu-22.04), Debian, Kali Linux, Fedora, openSUSE, and more.
Installing a Specific Linux Distribution
If you want to install a specific Linux distribution other than the default Ubuntu, or a particular version (e.g., install WSL Ubuntu 22.04), use the -d flag with the wsl --install command. This is a key install WSL command line option:
wsl --install -d <DistributionName>
Replace <DistributionName> with the exact name from the list generated by wsl -l -o. For example:
* To install Debian on WSL:
bash
                        wsl --install -d Debian
* To install Ubuntu 22.04 specifically (if not the default):
bash
                        wsl --install -d Ubuntu-22.04
If WSL core components are already installed (e.g., you ran wsl --install previously without -d), this command will just add the specified distribution to your existing WSL setup.
Installing from the Microsoft Store
You can also find and install Linux distributions for WSL directly from the Microsoft Store: 1. Open the Microsoft Store app on your Windows 11 machine. 2. Search for "WSL" or the name of a specific distribution you want (e.g., "Ubuntu", "Fedora", "Debian"). 3. Select the desired distribution from the search results and click "Get" or "Install". 4. After the WSL download and installation from the Store completes, launch it from the Start Menu to complete its initial setup (creating a user and password, as described earlier).
Understanding WSL1 vs. WSL2: Key Differences
It's crucial to understand the two major versions of WSL to appreciate why WSL 2 is preferred for most use cases, especially when you install WSL on Windows 11:
| Feature | WSL 1 | WSL 2 |
|---|---|---|
| Architecture | Translation layer (Linux system calls to Windows NT kernel) | Lightweight Virtual Machine with a full, genuine Linux kernel |
| Performance | Faster access to files mounted from Windows file system (/mnt/c) |
Significantly faster file system performance within the Linux environment (e.g., ~/) |
| System Calls | Not all Linux system calls fully implemented | Full system call compatibility (e.g., for Docker, FUSE, systemd support is improving) |
| Docker Support | Problematic or limited | Excellent, native-like support via Docker Desktop for Windows |
| Kernel Updates | Tied to Windows updates | Updated via Microsoft Update or manually using wsl --update |
| Recommendation | Legacy, suitable for a few specific niche cases only | Strongly Recommended for most users and all new installs |
WSL 2 is the default for new installations via wsl --install and is highly recommended for its superior performance within the Linux file system, full system call compatibility, and robust support for tools like Docker.
- Check Version of Installed Distributions:
bash wsl -l -v - Set WSL 2 as the Default for New Installations:
(This is typically done automatically by
wsl --installon modern Windows 11/10 systems. You can ensure it by running this command in PowerShell/CMD as Admin):bash wsl --set-default-version 2 - Convert an Existing Distribution to WSL 2 (or WSL 1):
If you have an older distribution running on WSL 1, you can convert it. Replace
<DistributionName>with your distro's name (e.g.,Ubuntu).bash wsl --set-version <DistributionName> 2To convert to WSL 1 (rarely needed):bash wsl --set-version <DistributionName> 1Conversion can take some time depending on the size of your distribution.
Essential WSL Commands for Everyday Use
Here are some key WSL commands to run in PowerShell or Command Prompt for managing your WSL Windows environment:
wslorwsl.exe: Launches your default Linux distribution into its home directory.wsl -l -vorwsl --list --verbose: Lists all installed Linux distributions, their current state (Running or Stopped), and the WSL version they are using.wsl --set-default <DistributionName>orwsl -s <DistributionName>: Sets the specified distribution as your default one, whichwslwill launch.wsl -d <DistributionName>: Runs a command or launches a shell in a specific, non-default distribution.wsl --shutdown: Immediately terminates all running WSL instances and the WSL 2 lightweight utility VM. This is useful if WSL becomes unresponsive or to apply changes made to.wslconfig.wsl --update: Checks for and applies updates to the WSL Linux kernel.wsl --unregister <DistributionName>: Warning: This command will uninstall WSL distribution specified and permanently delete its entire root file system. All Linux data for that distro will be lost. Use with extreme caution and back up data first.
Inside your Linux distribution's terminal (e.g., within Ubuntu launched via WSL):
sudo apt update && sudo apt upgrade -y: (For Debian/Ubuntu-based systems) Refreshes package lists from repositories and upgrades all installed packages to their newest versions. It's good practice to run this after a fresh install and periodically.explorer.exe .: (Run from within a Linux directory) Opens that directory in Windows File Explorer.exit: Closes the current Linux shell session.
Key WSL Features and How to Use Them
Understanding these features will help you make the most of your Linux on Windows 11 setup.
File System Access
WSL provides seamless file system interoperability between Windows and Linux:
- Accessing Windows Files from Linux: Your Windows drives (C:, D:, etc.) are automatically mounted under the
/mnt/directory within your WSL Linux environment. For example, your C: drive is typically accessible at/mnt/c/.bash # Example: Navigate to your Windows Desktop from the Linux terminal cd /mnt/c/Users/YourWindowsUsername/Desktop ls -la -
Accessing Linux Files from Windows (WSL 2): This is a powerful feature of WSL 2. Open Windows File Explorer and in the address bar, type
\\wsl$or\\wsl.localhost\and press Enter. You'll see folders for each of your installed WSL 2 distributions. You can then navigate into your Linux distribution's file system, for example:\\wsl$\Ubuntu\home\<your_linux_username>\.
Running Linux GUI Applications (WSLg on Windows 11)
On Windows 11, WSLg (Windows Subsystem for Linux GUI) is built-in, allowing you to run Linux GUI applications out-of-the-box with relative ease.
1. Ensure your WSL instance is up-to-date: wsl --update.
2. Install a GUI application within your Linux distribution using its package manager (e.g., in Ubuntu, sudo apt install gedit for the Gedit text editor, or sudo apt install gimp for GIMP).
3. Run the application by typing its command in the Linux terminal (e.g., gedit or gimp).
The application window will appear on your Windows desktop, integrated like any other Windows application. They may even appear in your Start Menu under their distribution's folder.
Using WSL with Docker Desktop
WSL 2 is the ideal backend for Docker Desktop on Windows, offering superior performance and compatibility for running Linux containers. This is a key use case for developers building scalable applications.
- Ensure WSL 2 is installed and you have at least one Linux distribution set up (as per this guide).
- Download and install Docker Desktop for Windows from the official Docker website.
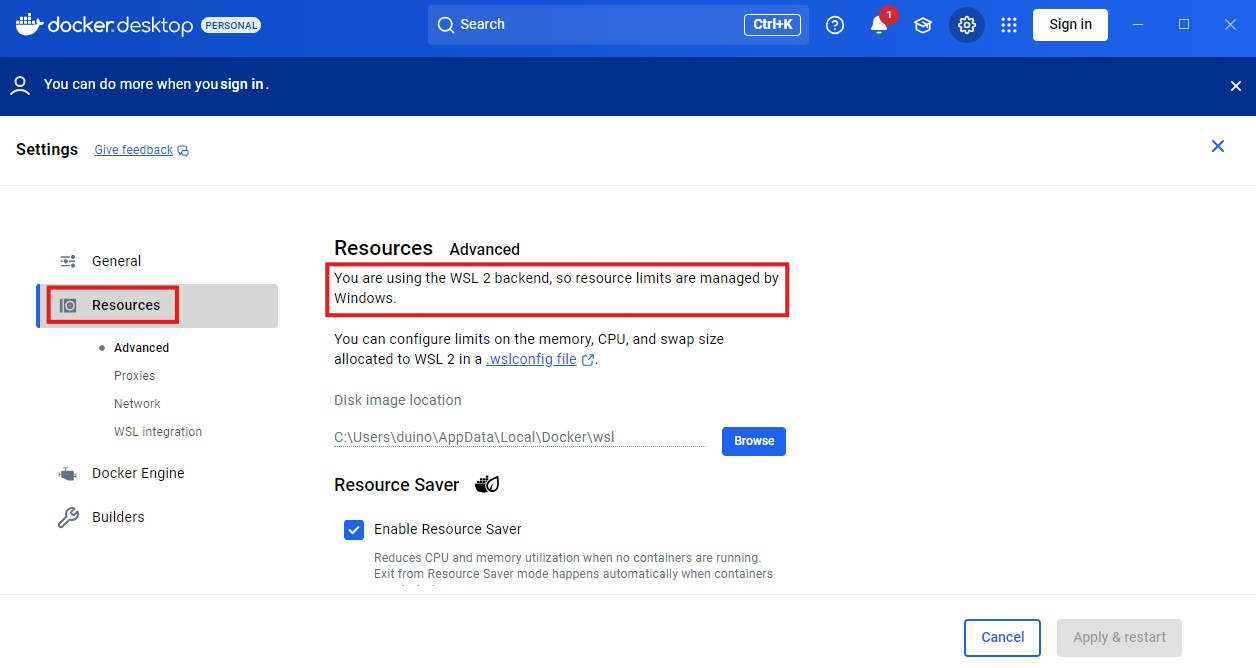
- During installation, or in Docker Desktop settings (Settings > General), ensure the "Use the WSL 2 based engine" option is selected and enabled.
- Docker Desktop will integrate with your default WSL 2 distribution. You can also manage which other installed WSL 2 distributions Docker Desktop can integrate with (Settings > Resources > WSL Integration).
This setup allows you to run docker commands from your Windows terminal (PowerShell/CMD) or directly within your WSL Linux distribution's terminal, with containers running efficiently within the WSL 2 environment. This is invaluable for modern development, testing, and deployment workflows, especially for indie hackers and startups focusing on freedom-first, scalable online projects.
Common WSL Installation Hiccups & Quick Fixes
While the wsl --install command has simplified the process, you might encounter issues:
- Virtualization Not Enabled in BIOS/UEFI: This is the most common problem if you encounter errors like
0x80370102or messages stating virtualization needs to be enabled. Reboot and enter BIOS/UEFI settings to enable "Intel VT-x," "AMD-V," or "SVM Mode." - "WSL 2 requires an update to its kernel component": Open an administrator PowerShell or CMD and run
wsl --update. If this doesn't resolve it, you may need to manually download and install the WSL2 Linux kernel update package from Microsoft's official WSL documentation. - Error codes like 0x80070003 or similar during download/installation: These can indicate network connectivity issues or temporary glitches. Check your internet connection, try disabling VPNs temporarily, or simply try a system reboot and run the
wsl --installcommand again. - Using an Older Windows Version: If you are on a Windows 10 version older than 2004 (Build 19041), the
wsl --installcommand might not work as expected or be available. It's highly recommended to update Windows. Otherwise, you'd need to follow older, manual installation steps (which are more complex and less recommended). - Third-Party Firewall or Antivirus Interference: In rare cases, some third-party security software can interfere with WSL's networking or installation. Temporarily disabling them (with caution, understanding the risks) can help diagnose if they are the cause.
For comprehensive troubleshooting, Microsoft's official WSL troubleshooting documentation is an excellent and up-to-date resource.
Uninstalling WSL and Linux Distributions
If you need to remove WSL or a specific Linux distribution from your system:
-
Unregistering (Uninstalling) a Specific Linux Distribution:
- First, list your installed distributions to get the exact name:
wsl -l -v - Then, use the
--unregistercommand. Be very careful, as this deletes all data within that Linux distribution's file system.bash wsl --unregister <DistributionName>Example:wsl --unregister Ubuntu-22.04Critical Caution: Back up any important files from within the Linux distribution before unregistering it. This action is irreversible.
- First, list your installed distributions to get the exact name:
-
Disabling WSL Features (Completely Removing WSL from Windows): To completely remove WSL from your system:
- First, unregister all installed Linux distributions as described above.
- Open "Turn Windows features on or off" from the Control Panel (you can search for it in the Start Menu).
- Uncheck "Windows Subsystem for Linux."
- Uncheck "Virtual Machine Platform" (if you are not using it for other purposes like Hyper-V).
- Click "OK" and restart your computer when prompted. This will effectively uninstall WSL Windows 11 components.
WSL Frequently Asked Questions (FAQ)
Here are answers to common questions about WSL:
Q1: How can I install WSL?
A: The easiest way on a modern Windows 11 or Windows 10 (version 2004+) system is to open PowerShell or Command Prompt as Administrator and run the command wsl --install. Then, reboot your computer when prompted.
Q2: How do I enable WSL on Windows 10?
A: The wsl --install command also works for installing WSL on Windows 10 version 2004 (Build 19041) and higher. For significantly older Windows 10 versions, manual installation steps were required, but updating your Windows 10 to a recent version is the recommended path for the simplest WSL setup.
Q3: What is the difference between WSL and WSL2? A: WSL 1 uses a translation layer to run Linux binaries, while WSL2 uses a lightweight VM with a full, genuine Linux kernel. This gives WSL 2 significantly better file I/O performance within the Linux environment, full system call compatibility (crucial for tools like Docker), and is the default and recommended version for new installs.
Q4: How to install Ubuntu 22.04 in WSL?
A: Open PowerShell or Command Prompt as Administrator and run wsl --install -d Ubuntu-22.04. If WSL core components are already installed, this command will specifically add the Ubuntu 22.04 distribution. You can also find it in the Microsoft Store.
Q5: Can you run Linux on Windows? A: Yes, absolutely. The Windows Subsystem for Linux (WSL) is designed precisely for this, allowing you to run a full Linux environment directly on your Windows machine.
Q6: Is WSL the same as Linux? A: WSL is a compatibility layer or feature within Windows that allows you to run actual Linux distributions (like Ubuntu, Debian, Fedora). With WSL 2, you are running a real Linux kernel. So, while WSL itself is a Windows technology, it enables you to use genuine Linux.
Q7: Can I have a Linux terminal on Windows? A: Yes. Once you install a Linux distribution using WSL (e.g., Ubuntu), you can launch its terminal (typically Bash shell) directly from the Windows Start Menu or integrate it into Windows Terminal for a tabbed experience.
Q8: Is it safe to install Linux on Windows 11 using WSL? A: Yes, WSL is an official Microsoft feature developed with security in mind. It runs Linux environments in an isolated way that is designed to be secure alongside your main Windows operations.
Q9: Does Windows 11 come with WSL?
A: WSL is not pre-installed by default on Windows 11. However, all necessary components for the Windows Subsystem for Linux download and installation are readily available and can be easily set up with the simple wsl --install command.
Q10: How do I know if WSL is installed on Windows 11?
A: Open PowerShell or Command Prompt and type wsl -l -v. If this command lists installed distributions or shows WSL help information, then WSL is installed. If the command is not recognized, WSL is likely not installed or its path is not configured correctly.
Q11: How do I open WSL2 on Windows 11?
A: You don't "open WSL2" directly as a standalone application. You open your installed Linux distribution (e.g., by clicking "Ubuntu" in the Start Menu). If that distribution is configured to use the WSL 2 architecture (which is the default for new installations via wsl --install), then it will automatically run using WSL 2. You can verify the version with wsl -l -v.
Q12: What is WSL used for? A: WSL is incredibly versatile. Common uses include web development (running Node.js, Python, Ruby, PHP servers), software development with Linux-based toolchains, running Linux command-line tools and scripts, managing remote servers (via SSH, Ansible), using Git for version control, working with Docker containers, AI/ML development with GPU acceleration, cross-platform application development, and simply learning and experimenting with the Linux operating system.
Conclusion: The Best of Both Worlds on Your Windows Machine
Successfully installing WSL on Windows 11 (or a modern Windows 10 system) empowers you with a robust, flexible, and highly integrated Linux environment right within your familiar Windows workflow. For indie makers, developers, startup founders, and tech enthusiasts aiming to build scalable online projects and achieve greater creative and financial freedom, WSL is an invaluable tool. From coding and containerization with Docker to system administration, data science, and AI/ML exploration, WSL allows you to seamlessly leverage the strengths of both operating systems.
Dive in, explore the vast Linux ecosystem, and revolutionize how you build, manage, and scale your projects on Windows. For the ambitious creative or developer part of the Makerbase.io community, mastering WSL is a significant step towards greater efficiency, autonomy, and freedom in your digital endeavors.