So, you need to add a custom code snippet to your WordPress site. Maybe it’s a Google Analytics tracking code, a Facebook Pixel, or a custom PHP function to add a new feature. A quick search might tell you to edit your theme’s functions.php file.
Stop right there.
Directly editing your theme files and the functions.php is one of the riskiest things you can do.
A single misplaced comma or typo can cause the infamous “white screen of death,” locking you out of your site. Even if you get it right, your custom code will be erased the next time you update your theme.
Thankfully, there’s a much safer, easier, and more professional way. This guide will give you a step-by-step walkthrough on how to safely add any custom code snippet in WordPress using the free and incredibly popular WPCode plugin.
Why You Shouldn’t Edit Your Theme’s functions.php File
Before we dive into the solution, it’s important to understand the problem. Here’s why using the Theme File Editor is a bad idea for beginners and pros alike:
- High Risk of Errors: A small syntax error in your
functions.phpfile can take your entire website offline. - Changes Are Temporary: When you update your WordPress theme (which you should do for security reasons), the
functions.phpfile is overwritten, and all your custom code is permanently deleted. - No Organization: Over time, as you add more snippets, your
functions.phpfile becomes a disorganized mess, making it impossible to track what code does what.
Introducing WPCode: Your Safe Container for Code Snippets
The WPCode plugin is the perfect solution to all these problems. Think of it as a safe, organized container for all your custom code that lives independently from your theme.
With over 2 million active installations, it’s the most trusted tool for the job because it allows you to:
- Add code without fear of breaking your site.
- Keep your snippets even when you switch or update your theme.
- Organize and label every snippet so you know exactly what it does.
- Load code only on specific pages to keep your site fast.
How to Install the Free WPCode Plugin
First things first, let’s get the plugin installed on your site.
- Log in to your WordPress dashboard.
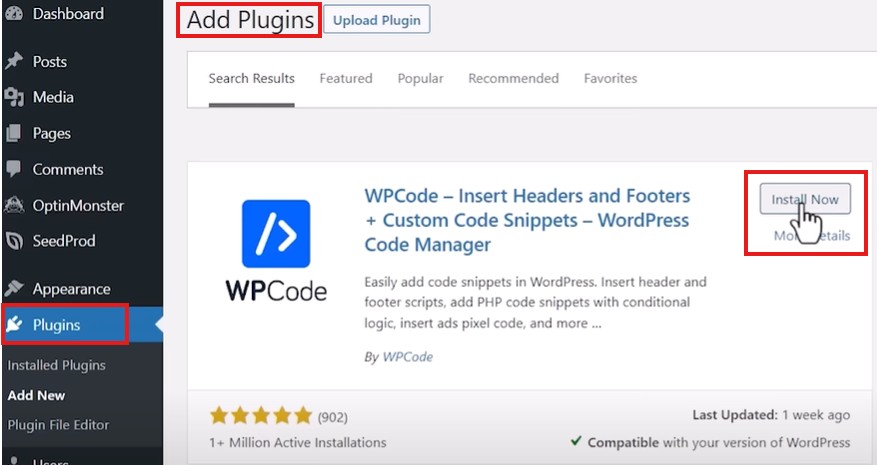
- Navigate to Plugins > Add New.
- In the search bar, type “WPCode“.
- Find the plugin named “WPCode – Insert Headers and Footers + Custom Code Snippets” and click Install Now.
- After installation, click Activate.
You’ll now see a new Code Snippets menu item on the left side of your dashboard. This is your new command center for all things code-related.
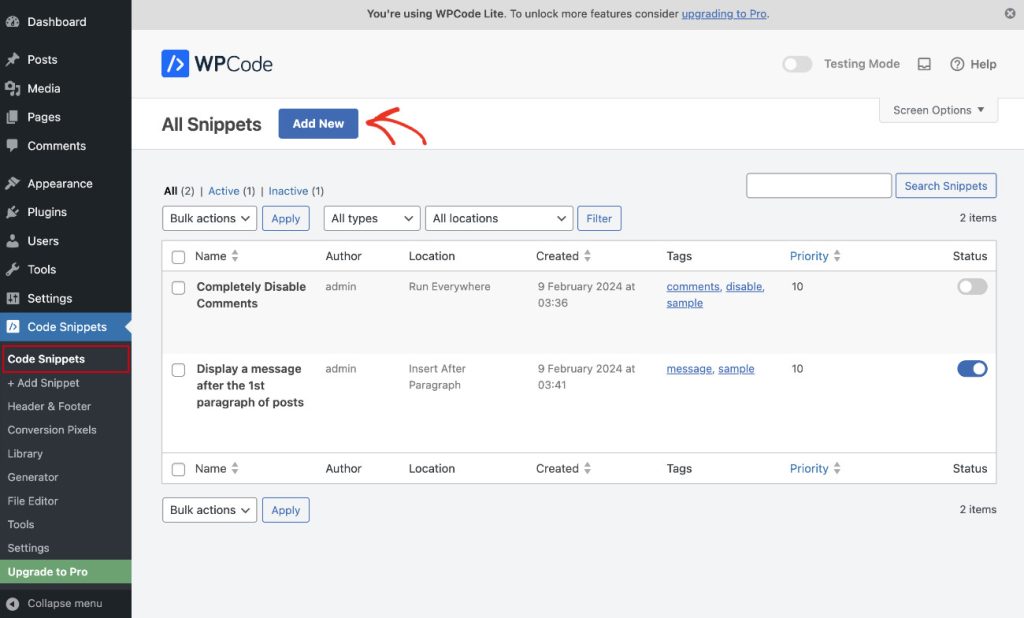
When you click on Code Snippets in the left sidebar, you’ll access the WPCode dashboard where you have two main options: create custom snippets from scratch or browse through a curated library of professionally-coded snippets from experienced WordPress developers.
How to Add Code Snippets to Your Entire WordPress Site
For scripts that need to run site-wide—like Google Analytics tracking codes, Facebook Pixels, or any other universal tracking scripts—WPCode offers the simplest possible approach. This method is perfect when you need consistent functionality across every page of your website.
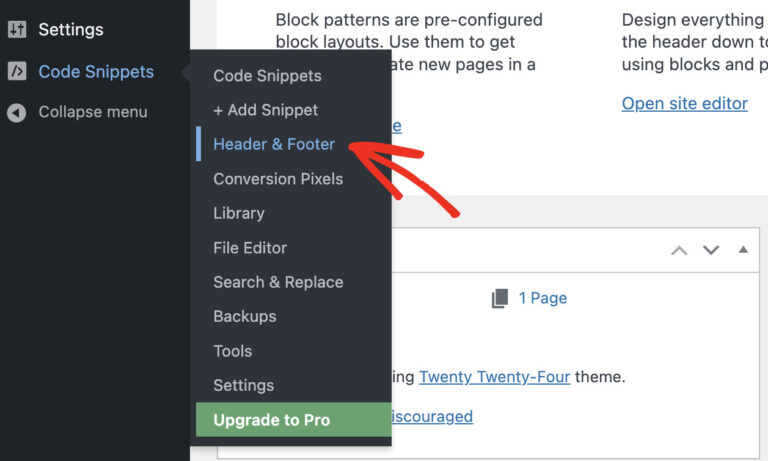
Step 1: Navigate to the Header & Footer Section
From your WordPress dashboard, navigate to Code Snippets > Header & Footer. This dedicated section is specifically designed for global code insertion, making it incredibly straightforward to add scripts that should load on every page.
Step 2: Choose Your Insertion Location
WPCode presents you with three strategically placed input areas: Header, Body, and Footer. Each serves a specific purpose in your website’s loading sequence.
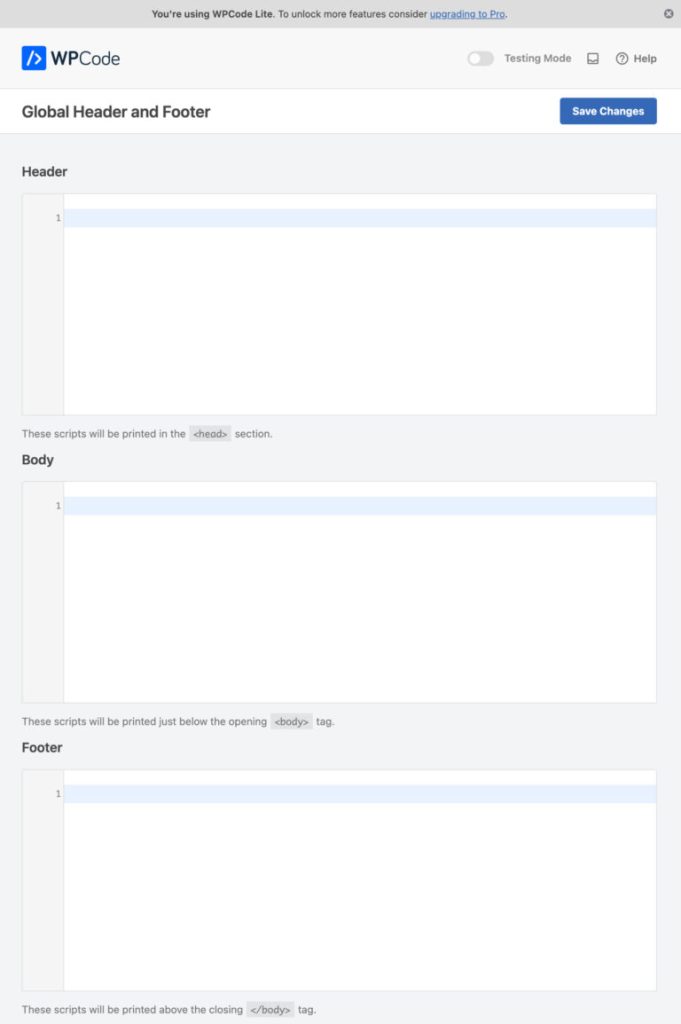
Step 3: Add Your Code to the Appropriate Section
Simply paste your script into the box that matches your requirements:
- Header Section: Code placed here gets inserted into your site’s
<head>section. This is ideal for verification codes, meta tags, or scripts that absolutely must load before any content appears. - Body Section: Scripts here are inserted immediately after the opening
<body>tag. This location is less commonly used but can be perfect for certain tracking pixels or initialization scripts. - Footer Section: Code here loads just before the closing
</body>tag. This is the recommended location for most scripts (especially analytics codes like Google Analytics) because it ensures your content loads first, creating a better user experience and faster perceived loading times.
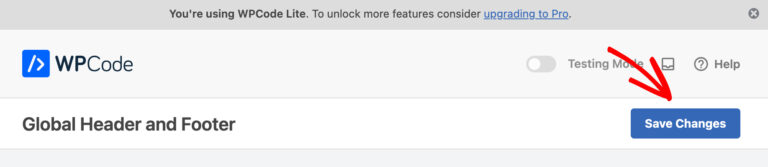
Step 4: Save and Activate
Once you’ve added your code, click the Save Changes button to store your snippets securely in your WordPress database.
Congratulations! Your code is now safely running across your entire website, and you can rest assured it will continue working even if you change themes or update WordPress.
Important Things to Remember
Before we move on, here are some key points to keep in mind for ongoing success:
- Easy Management: You can edit or remove any code snippets whenever needed through the same interface.
- Plugin Dependency: WPCode must remain installed and active for your custom code to continue functioning.
- Data Persistence: Even if the plugin is temporarily deactivated, your code remains securely stored in your WordPress database. Simply reactivating the plugin will restore all functionality.
- Cache Considerations: If you’re using a caching plugin (which you should be!), remember to clear your WordPress cache after making changes to ensure your updates appear correctly.
How To Add Scripts To Specific Pages In WordPress
Sometimes you need surgical precision with your code placement. Why load a contact form script on every blog page? Or analytics tracking for a specific landing page campaign across your entire site? You don’t have to.
This is where WPCode truly shines—with its Smart Conditional Logic, you can target exactly where your scripts run. This targeted approach isn’t just about organization; it’s about performance. Loading scripts only where they’re needed keeps your site fast and your visitors happy.
WPCode supports various types of scripts, including JavaScript, HTML, CSS, and PHP, providing a versatile solution for customizing your website. With over 2 million websites trusting WPCode to run their business, you can be confident you’re using a battle-tested solution that automates everything for you.
Here’s how to harness this power using WPCode’s Smart Conditional Logic.
Step 1: Create a New Custom Snippet
Instead of using the global Header & Footer section, we’ll create a targeted, individual snippet that gives us complete control over where it loads.
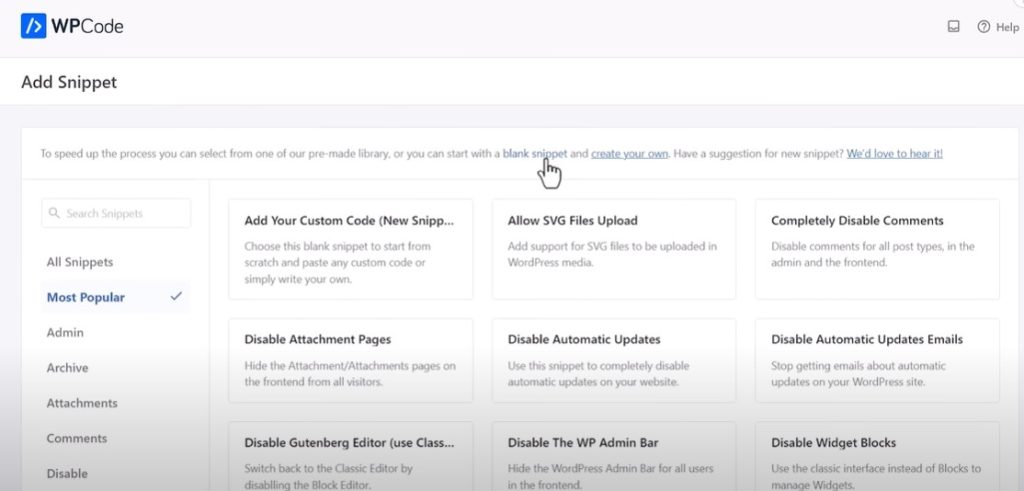
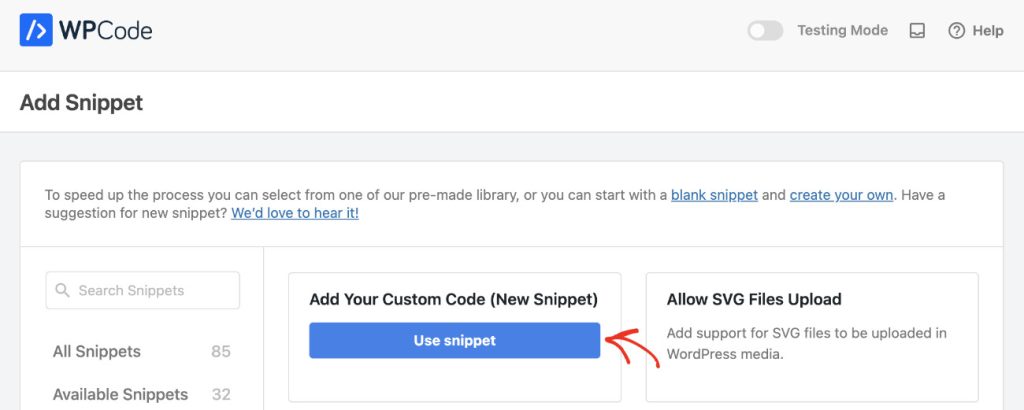
- Navigate to Code Snippets > + Add Snippet.
- Find “Add Your Custom Code (New Snippet)” and click Use Snippet.

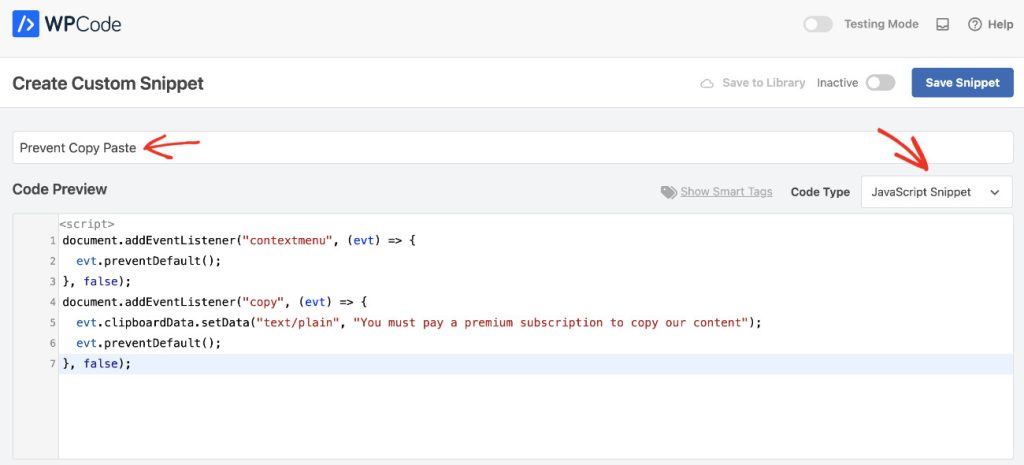
Step 2: Configure Your Snippet Details
This is where you set up the foundation of your targeted script.
- Add a Descriptive Title: Give your snippet a clear, memorable name like “Thank You Page Conversion Script” or “Product Page Analytics Tracker”. Future you will thank you for this clarity.
- Choose the Code Type: Select the appropriate type from the dropdown—typically JavaScript Snippet for tracking codes or HTML Snippet for embedded content.
- Add Your Script: Paste your code into the main “Code Preview” area.
Step 3: Set Up Smart Conditional Logic
Here’s where the magic happens—you’ll tell WPCode exactly which pages should load your script.
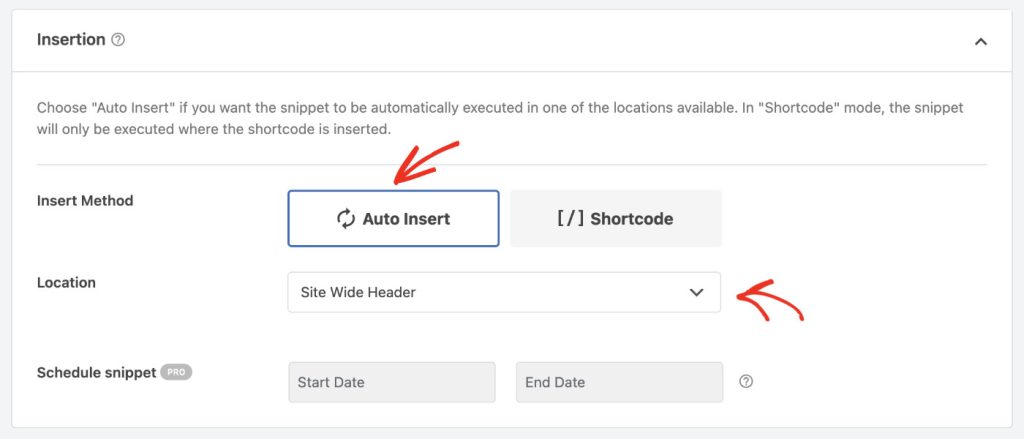
- In the Insertion section, keep the method as Auto Insert and the Location as Site Wide Header (or your preferred location). Don’t worry—our conditional logic will override this broad setting.
- Scroll down to the Smart Conditional Logic section and toggle Enable Logic on.
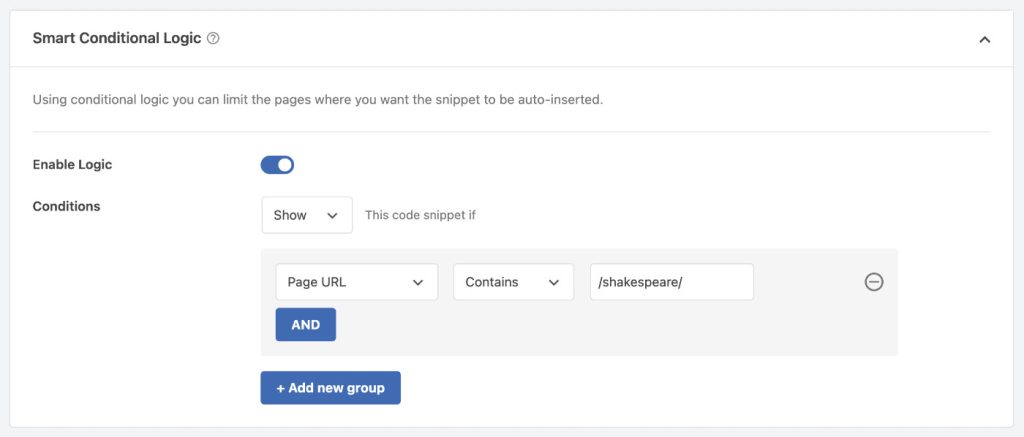
- Click + Add New Group to create your first targeting rule.
- For page-specific targeting, configure your rule like this:
- First dropdown: Select Page URL
- Second dropdown: Choose Contains (more flexible) or Is (exact match)
- Third field: Enter your page identifier. For example:
- Use
/thank-you/to target any page with “thank-you” in the URL - Use the complete URL
https://yourwebsite.com/thank-youfor exact matching - Include forward slashes before and after the page slug for better precision
- Use
- Pro Tip: You can create multiple rules to target different pages, post types, user roles, device types, and much more. WPCode’s conditional logic is incredibly powerful.
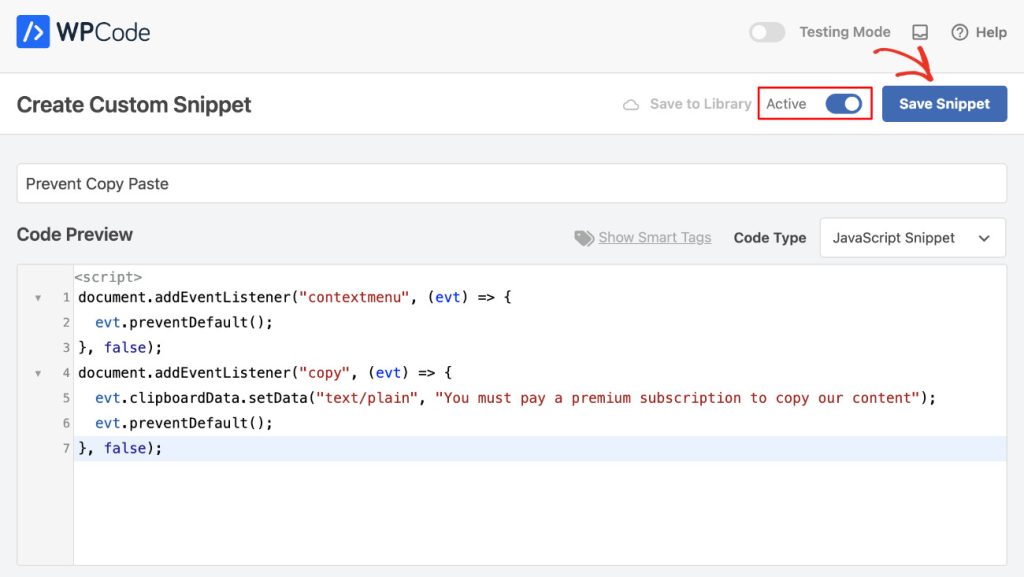
Step 4: Activate and Deploy Your Snippet
- At the top of the page, toggle the switch from Inactive to Active.
- Click Save Snippet to deploy your targeted code.
Your script is now live and will load only on the pages you’ve specified, keeping the rest of your site lean and fast.
For more information, please check out the official documentation and tutorial by WPCode.
Important Considerations
URL Changes: Keep in mind that if you change a page’s slug or URL structure, you’ll need to update your snippet conditions accordingly. While this is a minor maintenance task, it’s something to remember when reorganizing your site.
Alternative Targeting Methods: WPCode offers several other targeting options beyond URL matching, including targeting by post ID, post type, user role, and device type. These methods can be more reliable for certain use cases and don’t depend on URL structure.
Take Control of Your WordPress Site
By using WPCode, you’ve empowered yourself to add custom functionality to WordPress the right way—safely, cleanly, and with complete control. You no longer have to risk breaking your site or losing your work.
Install WPCode today and start unlocking the full potential of your WordPress website